Early Game Iron Farm
There are a lot of videos on youtube about “Easy Starter Iron Farms”, but to me they mostly miss the point. The building of the farms is not really the problem, the problem is getting the villagers in, and the big problem is getting the zombie in.
And more times than not, that part is elegantly skipped.
To me, the important bit is that you build your early game farm close to the ground. So no pillaring up 20 odd blocks, that just makes it harder to put the villagers in (and the zombie, oooh oooh, the zombie).
I usually put the villagers 7 blocks up from the ground, that is just enough that the iron golems will not spawn on the ground. And I’ve built it lower, iron golem spawn range is easily controlled - it’s just 8 blocks in every compass direction (simplified but true) and 6 blocks up or down from the villagers positions.
The actual design of the farm is secondary to me. They all tend to work at similiar rates.
Techman88’s Design
But I do have a preference, and it is this one: Easier Iron Farm (1.14.4)
Obviously, you don’t need the workstations anymore but other than that, it still works fine.
The main advantage over the the simplified 1.15+ designs is that the villagers are not standing on their beds, so if the farm stops working because a bed bugged out, you just wait for day when they are standing and destroy and place the bed again.
Only change that is necessary for me: 2 glass blocks above each bed, and skip the workstations. I build temporary stairs to the villager positions and let them go to sleep, than place those glass blocks and destroy the stairway.
The zombie: it is possible to just lure it up a spawn-proofed stairway, trap it using trap doors (ha! see what I did there!) and get it into a minecart. When the area is too dangerous (not a lot of spawning spaces underground) a better alternative may be some zombie trap with a roof, then getting the zombie in position during the day under controlled conditions.
Mechanics
Villagers that are scared (e.g. by a zombie) and that can see at least 2 other villagers will summon an Iron Golem, if they have not seen one in 700 game ticks. The villagers need to be within 10 blocks of each other.
The Iron Golem will spawn up to 8 blocks in horizontal directions (actually: negative 8, positive direciton 7) and 5 blocks up or down. The spawning rules are relaxed, they will spawn in water or lava and on transparent blocks, although they do need a flat top level surface and will not spawn on redstone dust or rails.
The Iron Golem will be detected in a cube up to 16 blocks away from the villagers, and since they are 3 blocks tall, 20 blocks down from the villager position is the first reasonable position for the killing floor.
Villagers are scared by a zombie up to 8 blocks away. Villagers need to see 2 others, and they need to be within 10 blocks of each other. Villagers also need to sleep - so the line of sight to the zombie needs to be interrupted from time to time. This farm accomplishes this by having them hopping up and down in the water source.
An easy way to visualize the distances is by using carpet mods builtin ai_tracker script.
/script load ai_tracker
/ai_tracker villager_buddy_detection
/ai_tracker villager_iron_golem_spawning
/ai_tracker villager_hostile_detection zombie
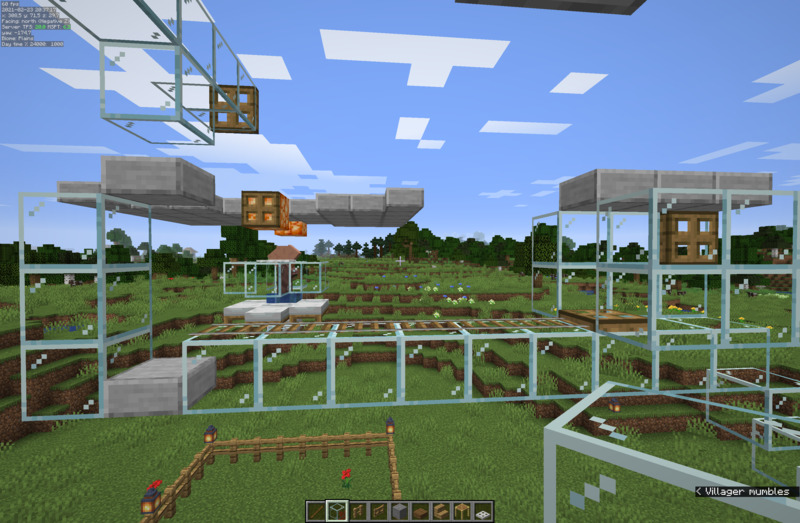
Building the farm
Either build this near to your base so you have it constantly loaded or in the spawn chunks.
Drowning check
Sometimes the villagers start to drown when they sleep. I think it’s positional - I’ve fixed farms by turning them by 90 degrees or re-building a block over. That’s why I always test the villager positions on the ground first.
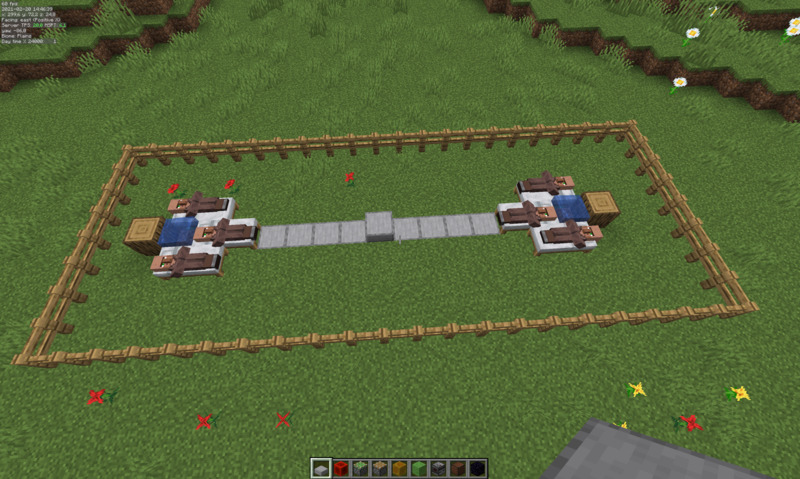
Start laying out the villager pods on the floor. The lower slab is the zombie position, on either side there are 4 spacer blocks, then the beds in a Y-shape with the feet towards the zombie. An empty space for the water source and another block so the water does not run out.
Put up some fences and bring villagers in from the nearest village. I prefer doing so by boat, especially at the start of the game when I don’t have the resources for building a railway line. If you need to go up a block, put a piston down next to a piston. Drive the boat onto the piston and press the button. This works surprisingly well.
Wait for night to fall and the villagers will go to bed. If one of them is drowning you’ll need to move the farm.
I also recommend lighting up the enclosure and some space around it, although I did not do it yet in this image.
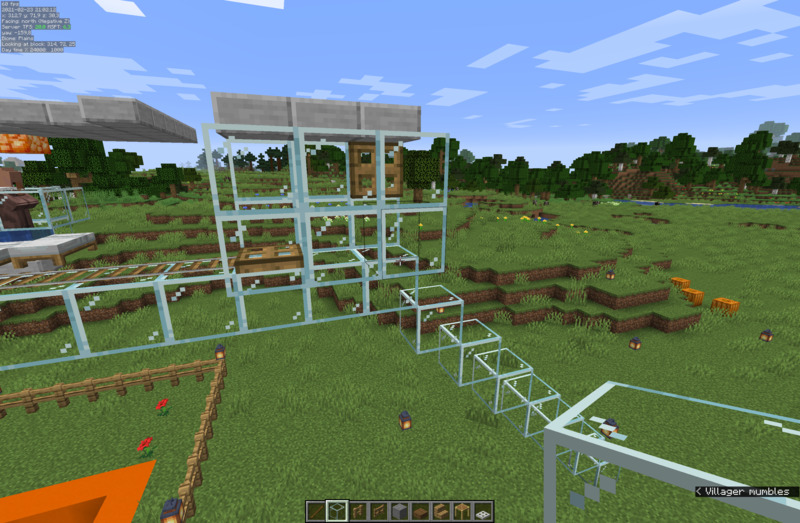
The Villager Pods
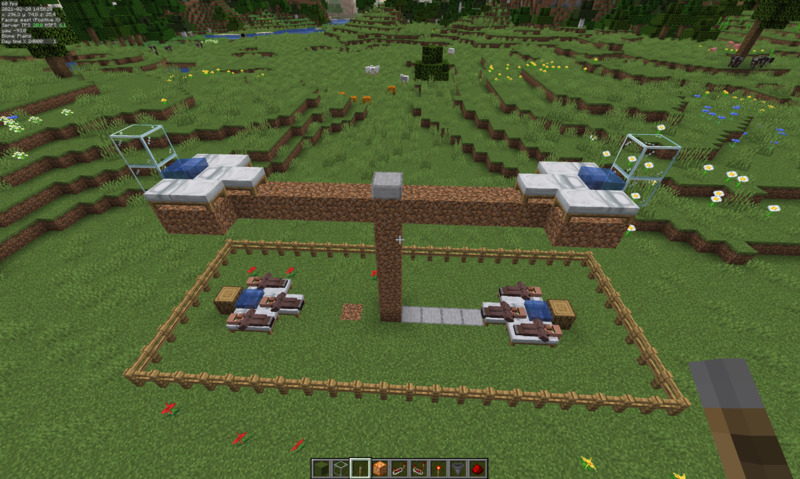
Remove the zombie position slab and pillar up 7 blocks, then place the zombie position slab again. Rebuild the villager pods at this height - 4 spacer blocks, then the beds. You can use any block you like below the villager position/water source. 2 glass blocks behind the villager position.
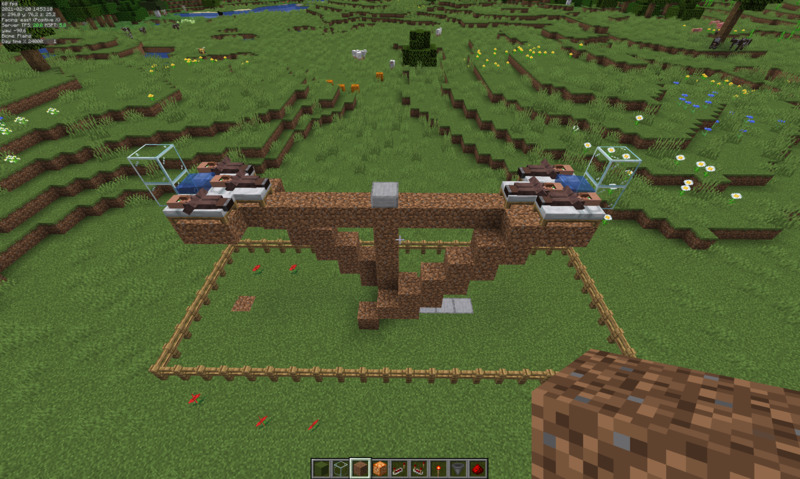
Build stairways up to the beds and destroy their old beds if you have not done so already. They should pathfind their way into the beds once night falls. Now you have to be fast: put 2 glass blocks over each bed. Put one carpet over the glass at each head end. Destroy all the temporary blocks. Once the villagers wake up they must not have a way down to the ground level.
The Zombie Position
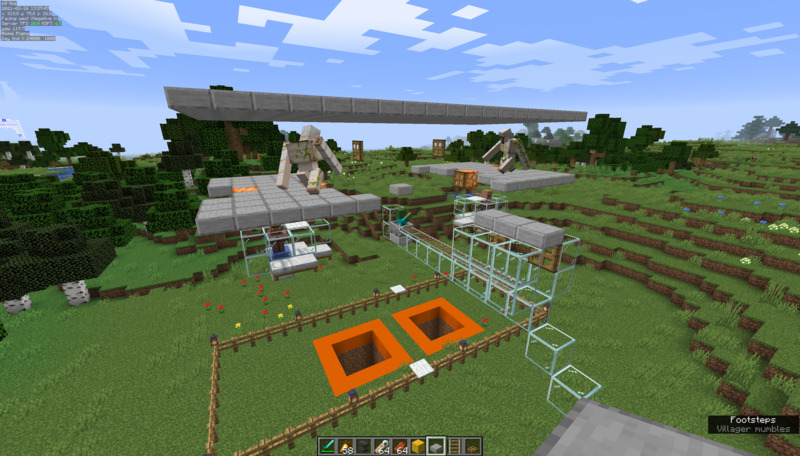
Put 3 glass blocks behind the zombie position, and another low slab above the zombie position (glass is now good here - the zombie will burn in the sunlight). The build out using glass blocks on the other side and put rails on top. I like to go at least 8 blocks - you don’t want to spawn an Iron Golem here to gank your zombie.

Go up 2 more temporary blocks (glass is so the trapdoors are easily seen). 2 blocks out on either side put trap doors. The trap door positions are important. Remove the temporary blocks once you are done. Even glass blocks will inhibit the Iron Golems pathfinding and they will get stuck on the platform, bringing your iron farm to a halt.
Note: only 2 glass blocks remain behind the zombie position - one at the height of the zombie slab and the one above it. That third block can stop Iron Golems.
The Spawning Pads and Drop Shafts
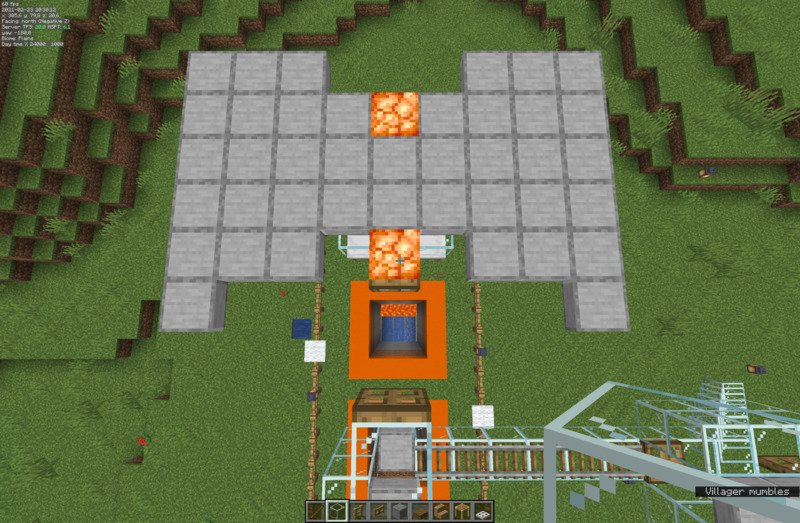
At the same height as the lower slab above the zombie position build the spawning pads. These should be upper slabs but sufficently lighted that no mobs will spawn. The shape works for me, for details see Techman’s video linked at the start of the post.
The drop shafts are 3x3 and the center is below the trapdoor that stops the Iron Golem from reaching the zombie. The floor of the drop shaft is at least 20 blocks below the villager positions. I recommend using look-at coordinates.
At the bottom, connect the 2 drop shafts and put water down on one end and a lava blade at the other end. 3 Hoppers below the lava blade lead into your storage system, for starters just put a chest there.
The Zombie Trap
Lots of ways to trap a zombie, this is usually the first thing I try. A narrow 3 long tunnel, spawnproof but opaque block on top. A trapdoor at the bottom will stop the zombie, but the player will fit. A trapdoor one higher a the other end can be put down to trap the zombie.
Once you have a zombie, don’t forget to rename it or catch one that
picks up items. On hard difficulty 50% will pick up items,
although I had difficulty getting one here. Maybe because I had /gamerule daylightCycle on?
Anyway the other option is to rename the zombie. Buy a nametag from a cleric,
rename the tag in an anvil and rename the zombie. I hear Rob is a popular name.
Now put a block below the trapdoor behind the zombie. Place another trapdoor 1 higher in front of the zombie and destroy the lower one. Place rails below the trapdoor and below the zombie. Shove a minecart into the zombie. Jump down, destroy the temp block and push the minecart and zombie into position.
The zombie will burn but it should survive the brief exposure.
Adding a Roof
Adding a roof is recommended because otherwise your villagers may be converted to witches by lightning strikes. Any block that can be hit by lightning needs to be at least 3 blocks away from the villagers.
For this farm, just put a solid roof of lower slabs 3-4 blocks above the spawning pads. The roof needs to cover all spawning pad blocks and trap doors.